How to enable ray tracing in Minecraft for better graphics

Minecraft is known for many qualities, but graphics are not typically among them. The incredibly flexible and dynamic building game chose a more simple yet pleasing art style to better serve its mechanics. That being said, while that blocky aesthetic will never go out of style, there are plenty of ways to improve the looks since it originally came out in 2011. Aside from graphics packs and shaders, the most impressive visual update you can add to Minecraft is ray tracing.

Difficulty

Moderate

Duration

30 minutes

What You Need

  • PC that can run ray tracing

  • Xbox Series X/S

  • Ray tracing-compatible resource pack

Ray tracing is one of the latest and most impressive graphical improvements video games have seen in the last few years. This system focuses on making light sources behave more realistically, which alone can make a game look years newer than it really is. Everything from shadows and reflections to world lighting just feel more real. However, it isn't something that's on by default. Whether you're playing on PC or the Xbox Series X/S, here's how you can try out ray tracing in Minecraft for yourself.
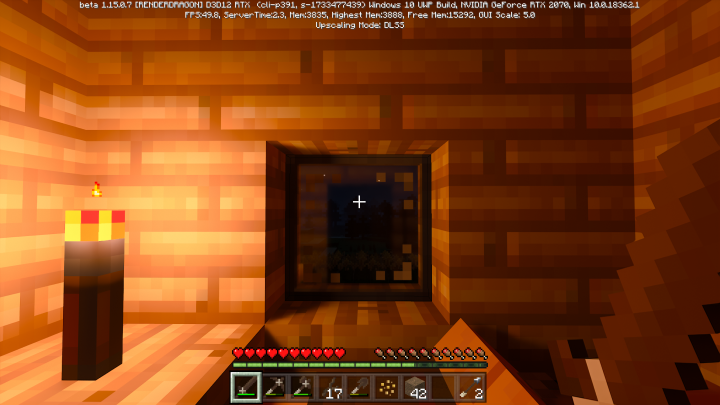
Minecraft RTX ray tracing beta
Matthew Smith / Digital Trends

How to turn on ray tracing on PC

PC is the most popular Minecraft platform and where ray tracing is most common in games since it is generally too taxing for consoles to handle. Here's how to turn it on.

Step 1: Load up your copy of Minecraft Bedrock Edition.

Step 2: If you don't have a ray tracing-enabled texture pack, open the Marketplace.

Step 3: Use the search function and type in "ray tracing."

Step 4: Download a ray tracing-enabled pack.

Step 5: Wait for the download to complete.

Step 6: Create a world using this pack.

Step 7: Return to the main menu.

Step 8: Go into Settings.

Step 9: Select Video.

Step 10: Scroll down and toggle on the Ray tracing slider.

Step 11: Load back into your world and enjoy the view!

How to use Ray Tracing with an Nvidia graphics card

If you have an Nvidia brand graphics card, turning on ray tracing is a much simpler process.

Step 1: Open the Settings section of the GeForce Experience

Step 2: Select General.

Step 3: Enable Experimental Features.

Step 4: Move to the Game tab and select the Enable Nvidia RTX option next to Minecraft.

Step 5: Launch Minecraft and enable RTX in the Video Settings.
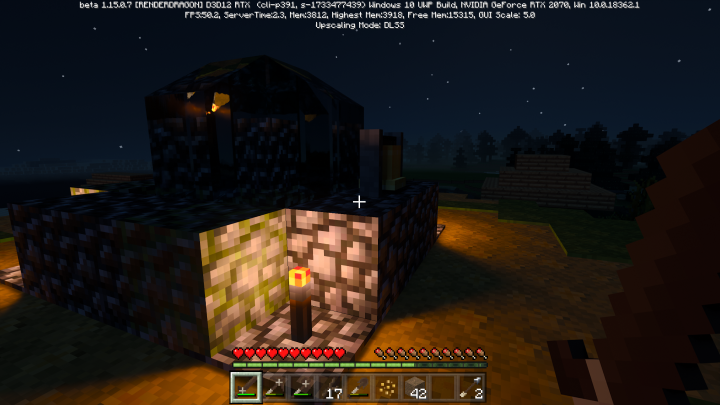
Minecraft RTX ray tracing beta
Matthew Smith / Digital Trends

How to turn on ray tracing on Xbox Series X/S

While ray tracing is technically available for Xbox Series X/S users, it is still in a preview stage, meaning you will need to do all the steps above on PC as well as the ones following to make it work.

Step 1: Host a Minecraft world on PC with ray tracing enabled.

Step 2: Download the Xbox Insider Hub app on your Xbox console.

Step 3: Sign up to be an Insider.

Step 4: Locate the Minecraft preview option under Previews.

Step 5: Select Join.

Step 6: Invite your Xbox account to your PC Minecraft world.

Step 7: Once in the world on your Xbox, open Settings.

Step 8: Select Video.

Step 9: Scroll down and toggle on Ray tracing.

Eventually, ray tracing should come to the standard Xbox versions of Minecraft, but for now, this is the only way to experience high-end lighting on your console.

Editors' Recommendations

Jesse Lennox
Jesse Lennox loves writing, games, and complaining about not having time to write and play games. He knows the names of more…
How long is Final Fantasy 7 Rebirth?
Cloud and his friends overlook a scenic field.

By expanding the Midgar section of Final Fantasy 7 into an entire game, Final Fantasy 7 Rebirth finally takes us beyond the walls into the world beyond. This much larger swath of land to explore begs the question of just how big this game will be. Between all the open-world tasks, sidequests, and minigames awaiting in the Gold Saucer, could this game really be a 100-hour experience as was claimed? What if you just tried to focus on the main story to see what has or hasn't changed? We've played through the entirety of Final Fantasy 7: Rebirth and can give you a good idea of just how long it will take you to reach this chapter's conclusion.

Note: We will not be spoiling any story details, but will list how many chapters there are.
How long is Final Fantasy 7 Rebirth?

Read more
How to get Zinc Ore in Final Fantasy 7 Rebirth
Cloud flies on a Chocobo in Final Fantasy VII Rebirth.

After breaking out of the confined spaces of Midgar in Final Fantasy 7 Rebirth, a lot of new opportunities and mechanics have been introduced. Along with some standard open-world activities, collecting tons of resources as you travel will be a constant. Icons for all sorts of rocks, plants, and beast parts are needed to transmute new items. Zinc Ore is no different, but it is required for some great accessories you probably want to make early. If you need this precious rock but don't know where to start looking, hop on your chocobo, and we'll lead you right to it.
Where to find zinc ore

Zinc Ore can only be found in the mid- to late-game regions. These include the Corel and Gongaga regions, Cosmo Canyon, Nibel region, and the Meridian Ocean. The most plentiful location we've found the ore is in Corel, and most often on Mount Corel itself. Ride your chocobo here and pay attention when it notices something hidden. Sniff it out, and there's a decent chance you will find some Zinc Ore, but it also appears as normal pickups in the environment. There's also a chance that enemies will drop this resource after battle, so don't skip by them when searching. Unfortunately, all items in an area appear to be randomized, so you can't count on finding Zinc Ore every time, even in the same spots, but this is by far the best place to go.

Read more
How to find quetzalcoatl talon in Final Fantasy 7 Rebirth
Cloud about to fight a monster in Final Fantasy 7 Rebirth.

There's a lot to take in during the opening hours of Final Fantasy 7 Rebirth. Not only do you have an entire cast of characters to play as right away, but a fast hub world to explore. One thing you'll get very familiar with right away is collecting resources for crafting items. These things are littered all over the world, begging to be collected. However, there are rare parts out there, such as the Quetzalcoatl Talon, that you can only get from one specific source. If you're trying to finish the "Where the Wind Blows" side quest specifically, you'll need this fiend's claw to complete it, so let's hunt it down.
Where to find the Quetzalcoatl Talon

The Quetzalcoatl Talon will drop only from, you guessed it, a Quetzalcoatl. Finding this beast first requires you to do some of Chadly's legwork, specifically scanning four Lifestream Crystals in the region. Once that's done, he will chime in and inform you that he's located the beast in question and start the "Classified Intel: Winged Lacertillian of Yore" objective.

Read more