I prefer those with a two-step process of applying the main colour paint followed by a clear coat. This, in my observation, gives a lasting finish.
BHPian r2212xx recently shared this with other enthusiasts.
Greetings! After years of being a silent spectator, I decided to come out of the cocoon and join this forum. Considering the ethos here, the first post must be something useful. Therefore, I decided to share about the yearly detailing and sprucing I do for my steed, my 2012 Honda Aviator in Pearl Igneous Black.
I have kept the post compact and stepwise for ease of understanding. Also, have added images wherever they add value only.
But first, the cosmetics:
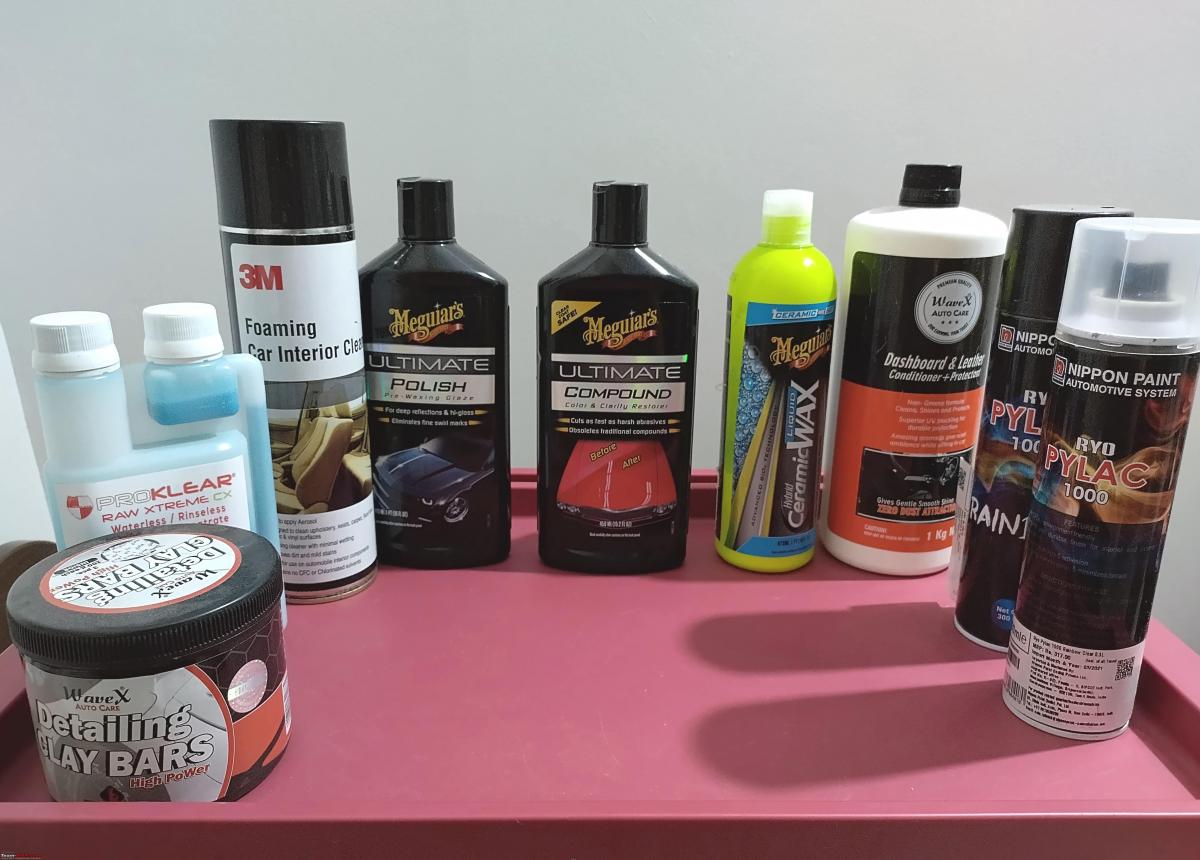
Please note that none of these products were handed down as samples. After several trials and errors and burning holes through my wallet, I zeroed down on these since they best suited my use. Now with the main part.
Step 1:
The first step is to have the vehicle washed. You may wash it at home or your local mechanic. Alternatively, plan the detailing after a service at the authorised service centre where they wash it thoroughly before handing over the vehicle. I did the latter.
Step 2:
I used a rinseless wash to clean the vehicle. Prefer those with some waxes since it gives a great pre-shine. Make sure to clean those wheels.
Step 3:
Next, I clayed all the painted components with medium- to strong-strength clay and a generous amount of clay lubricant. Most rinseless car wash concentrates double up as clay lubes, just check for the dilution ratio mentioned for use as a clay lubricant. Once done claying the painted bits, check the plastic parts. The dashboard plastic has a design with several hills and valleys where a lot of grime gets accumulated, so I clayed those areas. I avoided the speedometer’s transparent plastic since it is scratch-prone.
Step 4:
It was time to clean the plastic components, such as those in the dashboard, footboard area, and underseat area. You may use any car dashboard cleaner liquid spray, but a foam-based cleaner works best to loosen grime and brighten the plastic.
The foam has a shaving foam-like consistency:
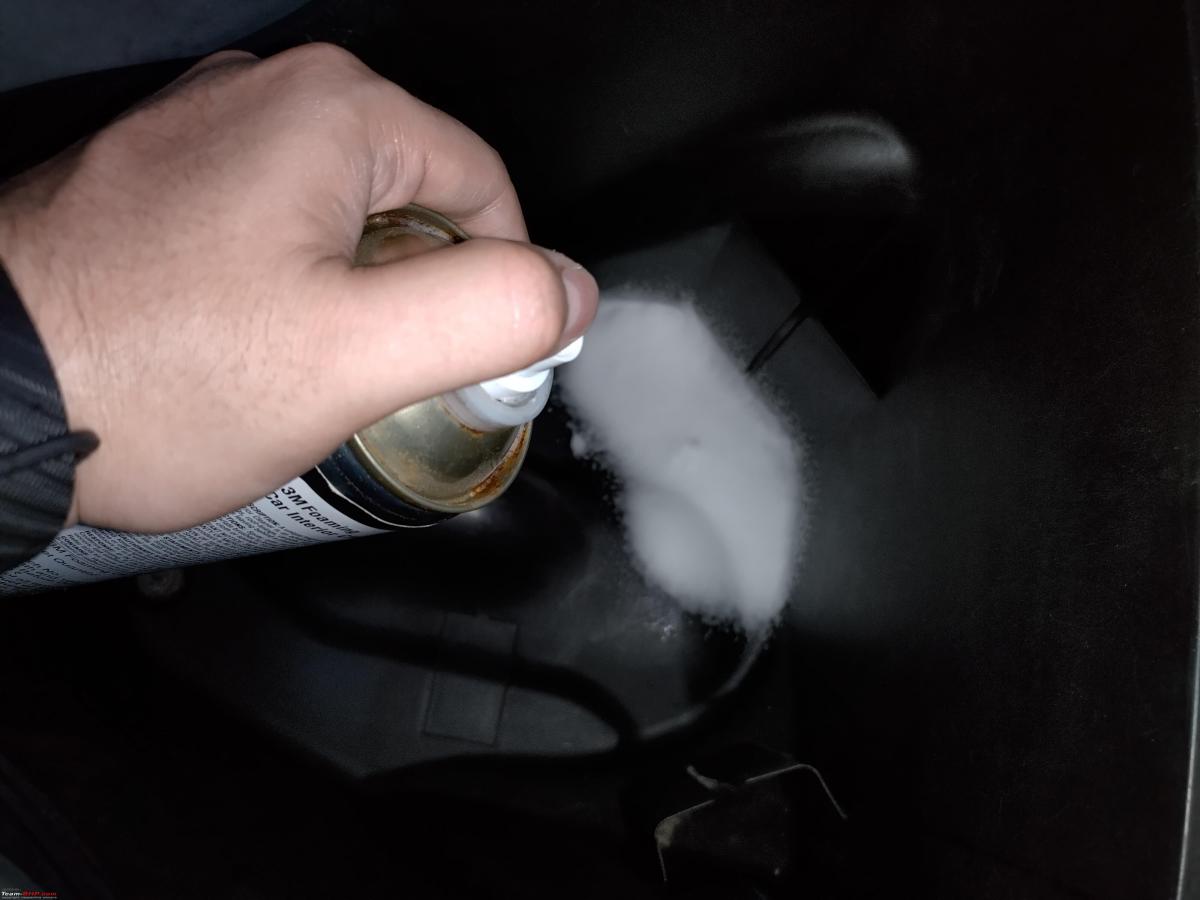
The 3M interior cleaning foam contains coconut oil that leaves a subtle shine. I used a standard sponge or applicator sponge to scrub the dirt. Wipe the remaining foam with a dry microfiber cloth.
Step 5:
I applied dashboard polish to all the plastic components cleaned in Step 4. You may use any dashboard polish.
Step 6:
It was the turn of the compound. I used Meguiar’s Ultimate Compound. I applied it as per directions on the bottle using an applicator sponge. The compound works best for paint on metal surfaces, so for Aviator, it would be the front mudguard, front side fenders, and footboard. In my observation, it barely brings any change when applied to painted fiber and plastic parts. Since the application was by hand, I made six to seven passes before wiping it off.
Step 7:
Follow up with polish. I was using Meguiar’s Ultimate Polish, so I applied at small sections at a time with up to three to four passes. I made sure it did not dry and was still wet when wiping it. Leaving it for too long leaves whitish stains that will take another round of washing and prep work to remove. Polish can be applied to all painted surfaces. Do not apply it to any non-painted surface since it will stain them.
Step 8:
Wax the vehicle. In my experience, ceramic waxes work the best. They are very forgiving, you do not have to worry about them getting into grooves or accidentally spilling them over any plastic component. You can apply ceramic waxes to all surfaces. I applied it to the external, exposed plastic components, as well, to give them some water-repellent abilities and provide extra shine.
Step 9:
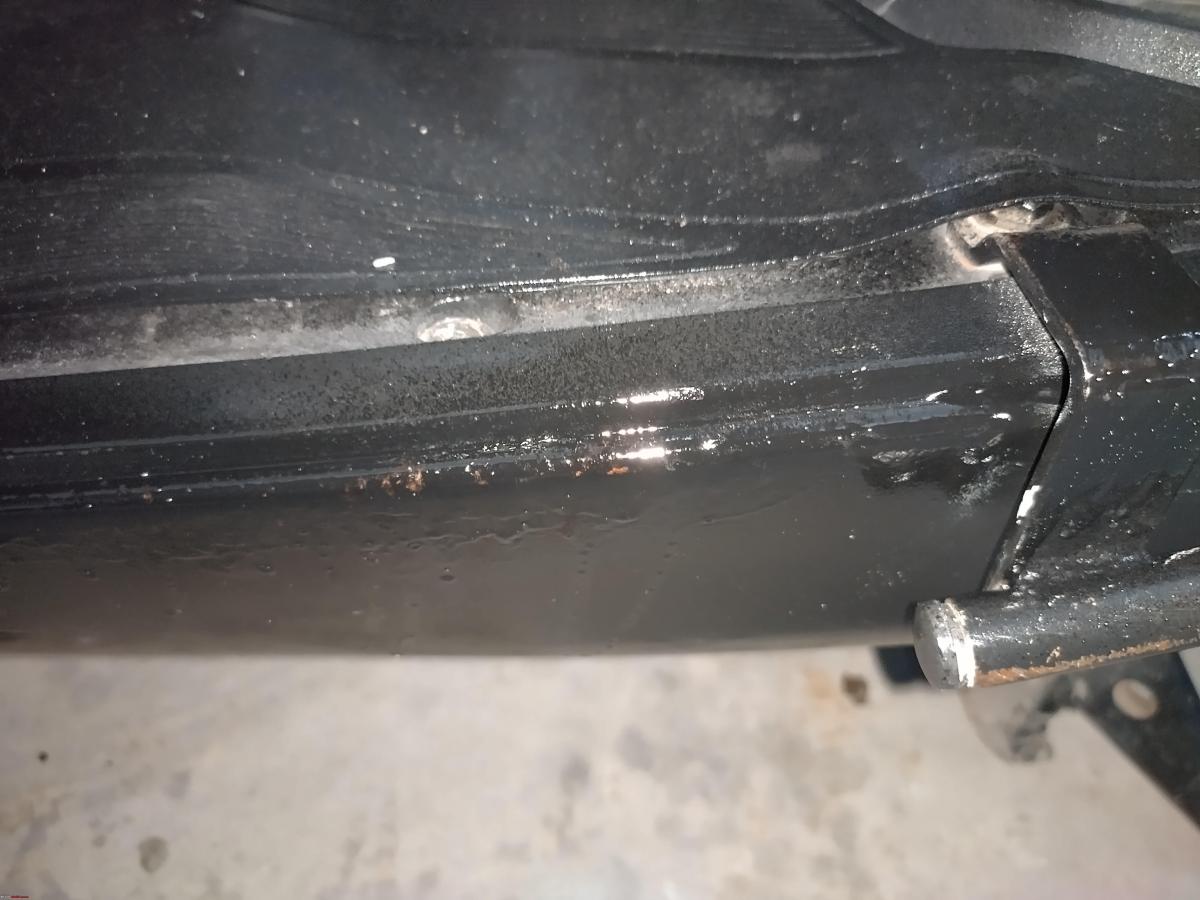
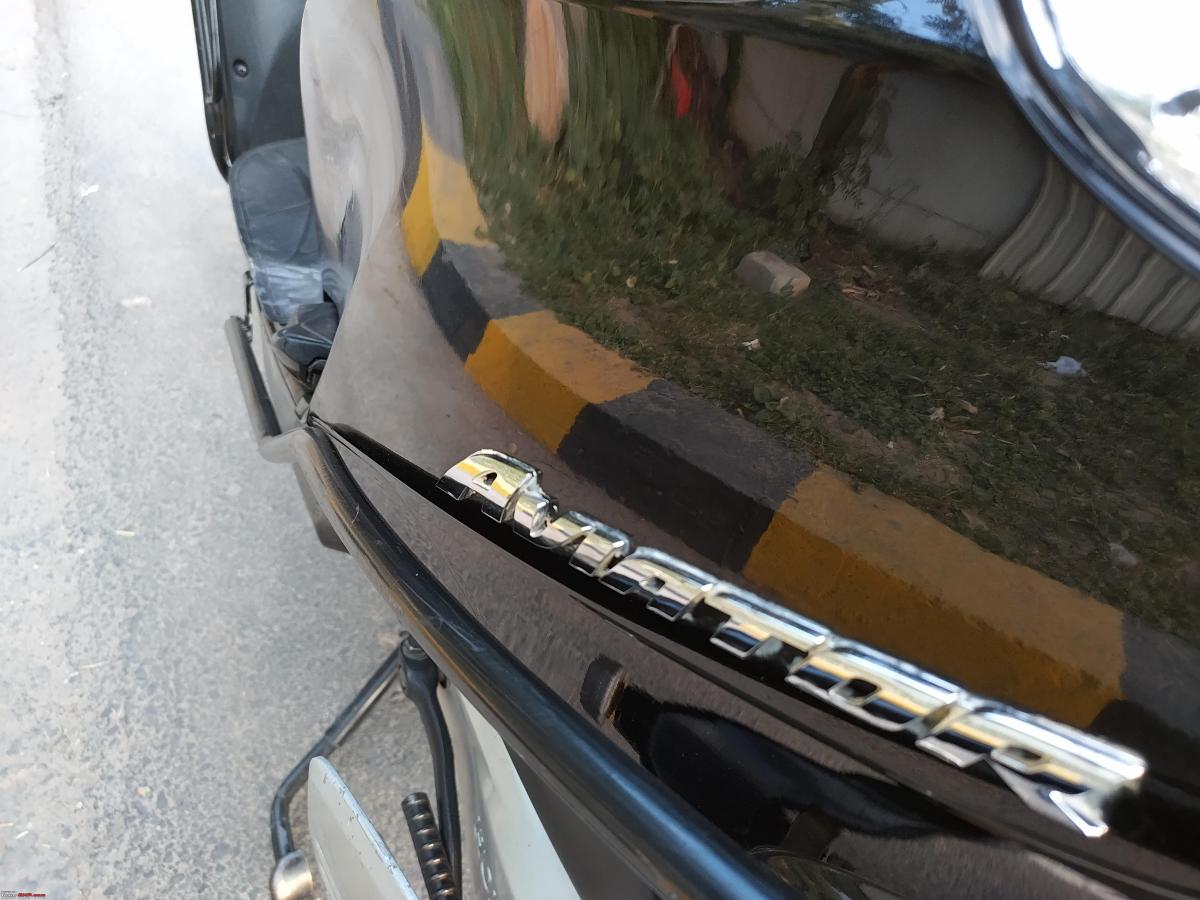
The detailing is done basically in Step 8. But I wished to paint some rusted bits and chipped parts. You may choose spots that you wish to paint and stick paper around them using painter’s tape.

I cut a window through this footwell paper and sprayed through it since I had to paint small areas. You may use any automobile paint matching your vehicle’s colour.
The results after the first coat:
I prefer those with a two-step process of applying the main colour paint followed by a clear coat. This, in my observation, gives a lasting finish. Do remember these automobile paints are DIY-only; do not expect a professional-grade finish. They are best to cover up rusted bits and last for a year, depending on your driving conditions and frequency.
Step 10:
It is best to give a gap of at least 24 hours for the paint to dry and stick. I gave a gap of four days or 96 hours. One last check and wipe, and it was all set for the spin!
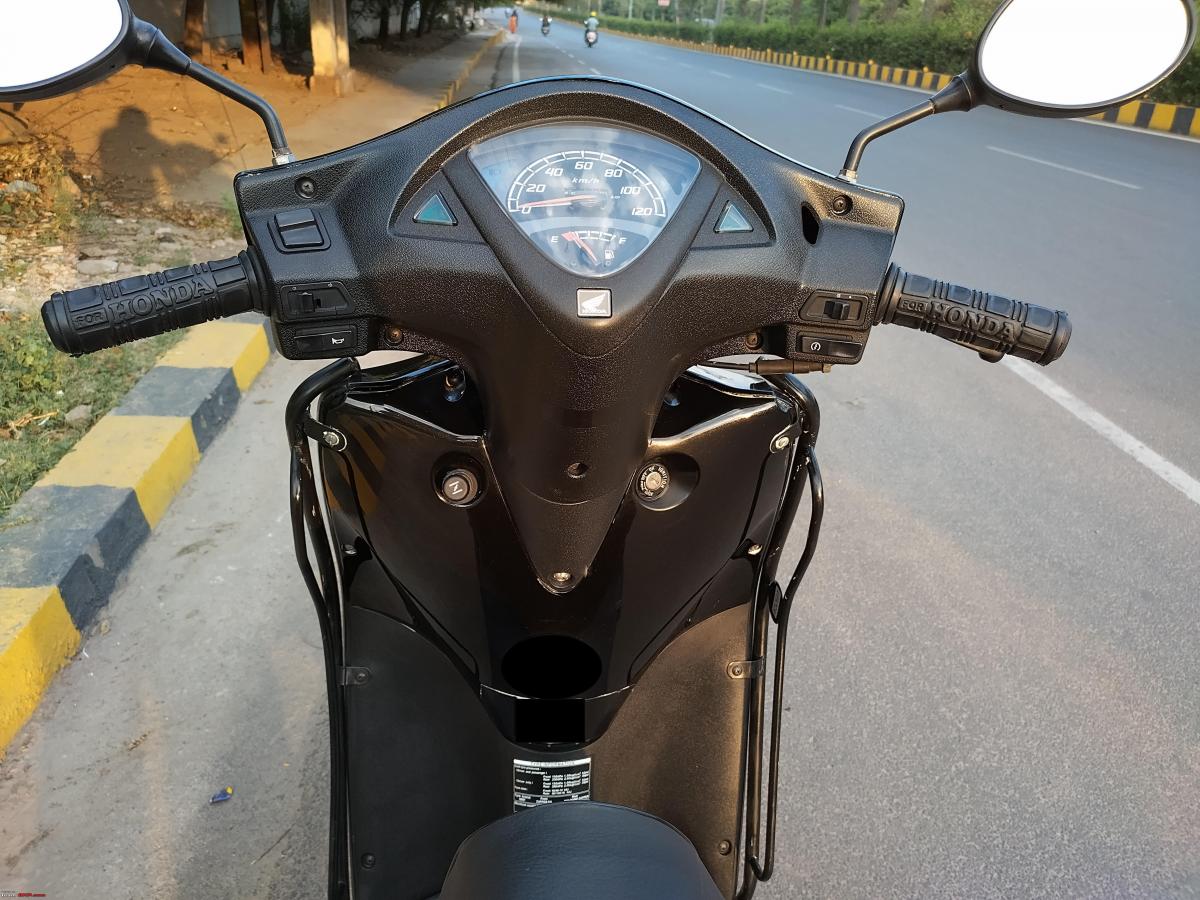
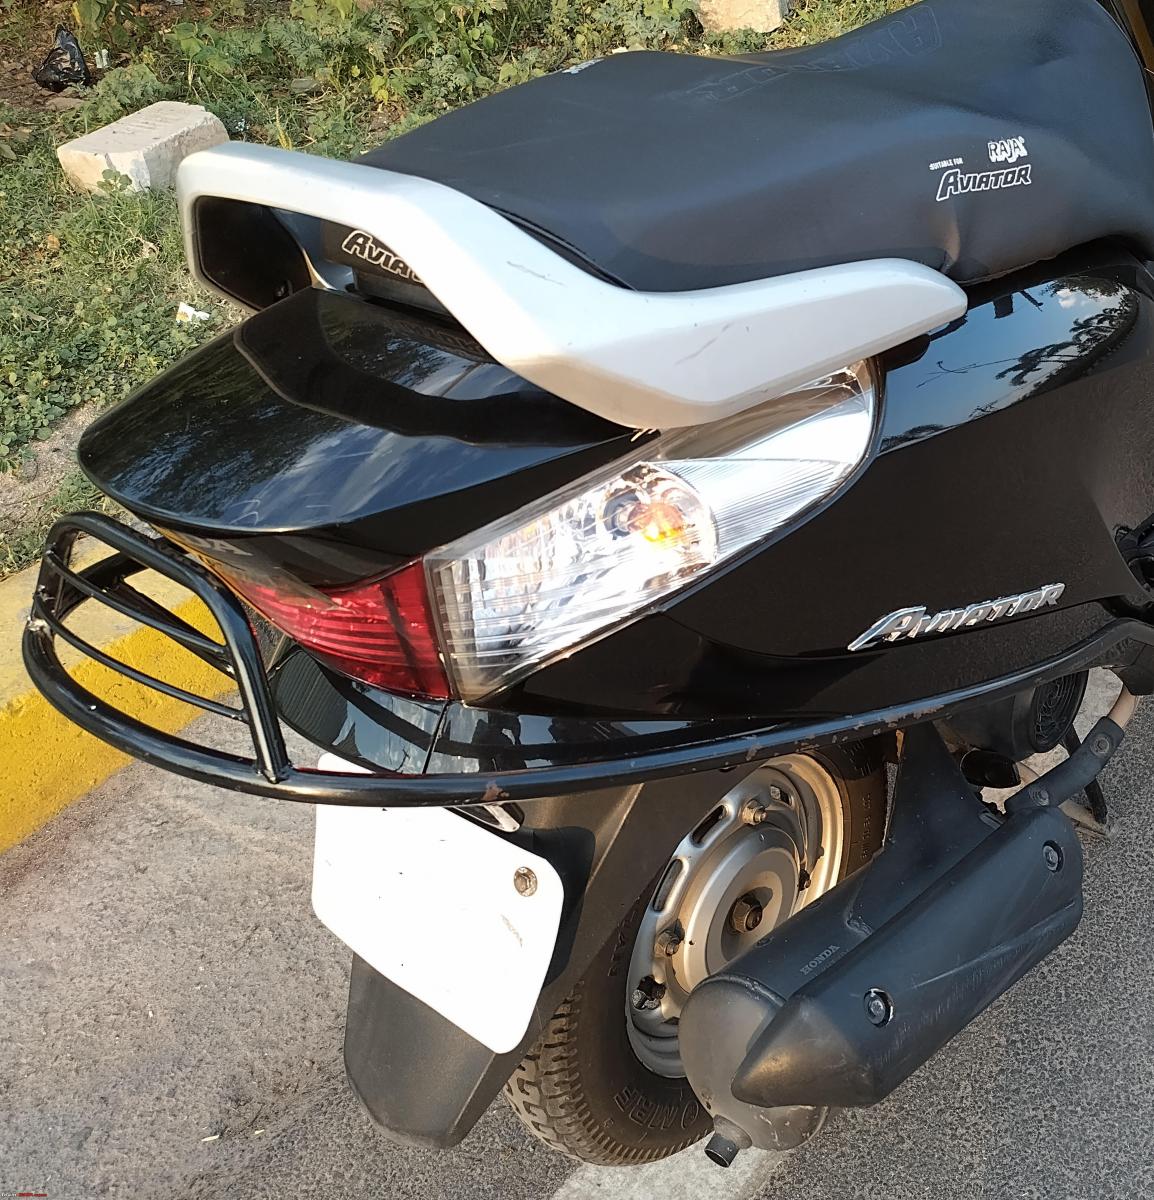
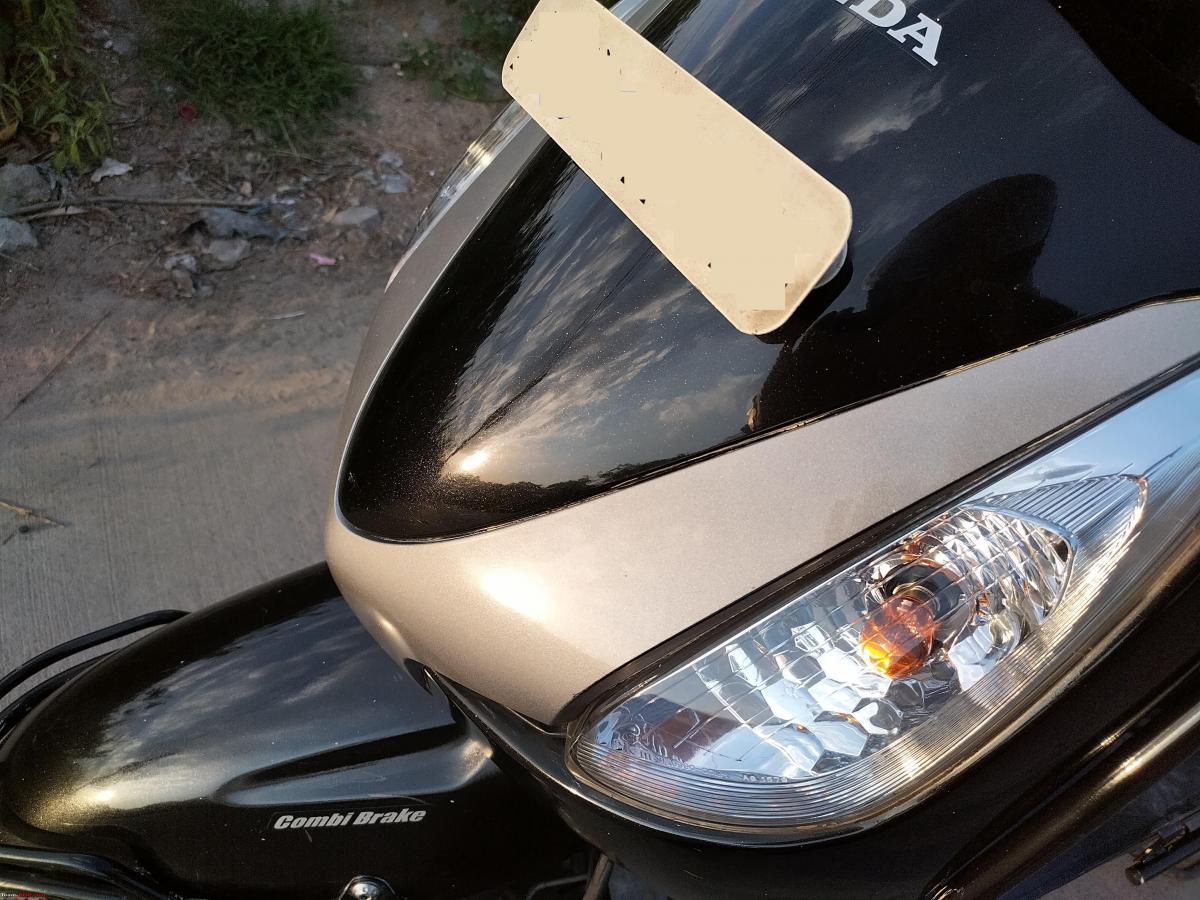
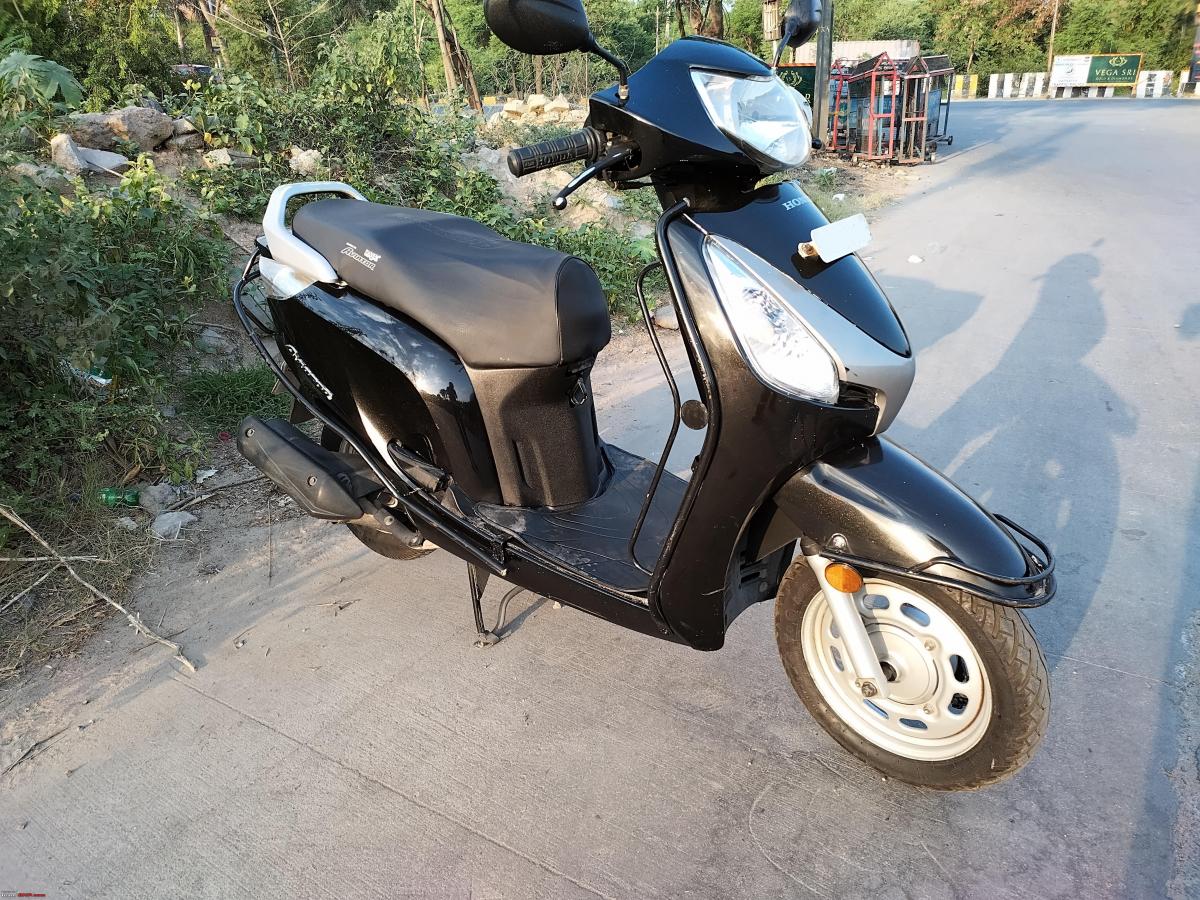
Here are the pictures of the results:


Listing some miscellaneous points that I could not fit anywhere but wanted to share:
- All the products shared here can be used for four- and two-wheelers. So you may be able to replicate most of these steps even for a four-wheeler.
- Remember to wear an old pair of eyeglasses, which you do not mind getting some stray spray marks on. Wear gloves and a mask when applying the paint. You may use silicone or latex gloves. I wore three cloth masks during spraying since they are sufficient to protect during DIY painting.
Brief points about the vehicle:
- The vehicle itself is a gem, a true testimony to Honda’s engineering. I have driven it through some of the worst roads and for hours when I had a field job, and it never let me down. Once, I underestimated the depth of a water-logged road and drove straight into what was a pond in the middle of the road during monsoons. The engine spluttered, turned off, and wouldn’t start. I was mentally prepared to say my goodbyes. I pushed it for about 100 metres and tried starting it with a kick, and it breathed back to life. All I needed after that incident was an oil change and greasing of some components.
- No significant issues with the vehicle except the occasional cold start reluctance in peak winters. Yes, and the infamous regulator rectifier trouble that I guess all Aviators from pre-BS-4 era were prone, and it was shared in a few posts on this forum. It took four fused headlights for the SA to realise the component was faulty.
I plan to keep it as long as I can. I recently had the front suspension overhauled at the ASC. Next, planning to get a new set of wheels, perhaps the alloy ones with drums that come with the new Activa H-smart, since the wheel sizes and suspension are identical.
Check out BHPian comments for more insights and information.