Just like Fallen Order before it, Star Wars Jedi: Survivor has many Souls-like elements. Outside of the general flow of combat, and the way Meditation Points work, Stims are essentially analogous to your Estus flas — a limited healing resource that you can only replenish by resting. You will only start with a meager two Stims, leaving you with very little room for error even on low-difficulty settings. Thankfully, Stim Upgrades allow you to increase that number by one for each you manage to find. Given how powerful these are, you’ll want to gather up as many as possible to ensure your survival in the galaxy far, far away. If The Force isn’t so strong with you, allow us to guide you to all the Stim Upgrade locations in Star Wars Jedi: Survivor.
We will outline where to find each Stim organized by the planet they’re on, so minor spoilers ahead if you haven’t seen every planet in the game yet.
All Stim Upgrades on Coruscant
Undercity Meats

From this Meditation Point, look to your left for the wall you can use your Jedi Jump to scale. Do so and take out the enemy droid on the other side, letting you safely open the large chest at the back of the area it was protecting.
All Stim Upgrades on Koboh
Doma’s Shop

After getting to Rambler’s Reach Outpost on Koboh, you can find Doma’s shop to spend your collecter Priorite on various items, outfits, and other cosmetics. Before you spend anything, make sure you save at least 10 for the Mysterious Keycode, which you can use to unlock the door inside this very shop to reveal the next chest holding a Stim Upgrade.
Basalt Rift
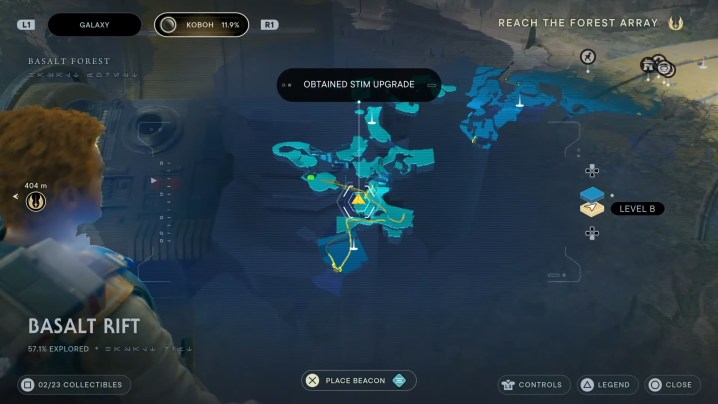
This is the area you will be brought to during the “Reach the Forest Array” main story mission. After you encounter a mogu taking out a stormtrooper, get behind it and wall run along the cliff, and climb up some vines to the top of a slope leading to the Rift Passage area. Don’t enter there, but head right to unlock the chest first.
Derelict Dam

This chest requires the Force Lift ability, so fast travel back here once you have it. From the workbench, take the elevator on the right. At the top level, Force Lift the door open to your right and take on the Matriach Gorocco mini-boss.
Diagnostics Corridor
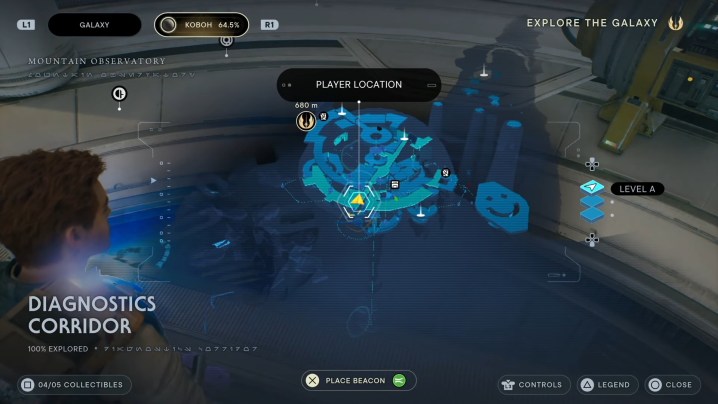
When you’re making your way to the Mountain Observatory during the main story, proceed as normal until you come to the fan you need to grapple on to avoid an electrified barrier. After getting across, turn around and squeeze through a partially open door. Once through, toss the grapple pad out the window and launch off it to get to the floor above where you started and get the chest.
Foothill Falls
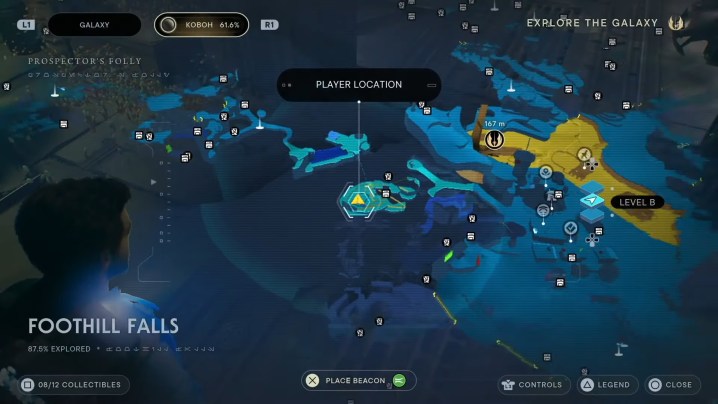
In the Prospector’s Folly zone, go north to where the rumor location on your map is marked in the center. Wall run and swing along the edge to get to the platform overlooking the shack and have BD activate the machine to spawn a mine. Use the Force to pick it up and use it to blow a hole in the roof of the shack. Jump on inside to get the Stim Upgrade.
Viscid Bog
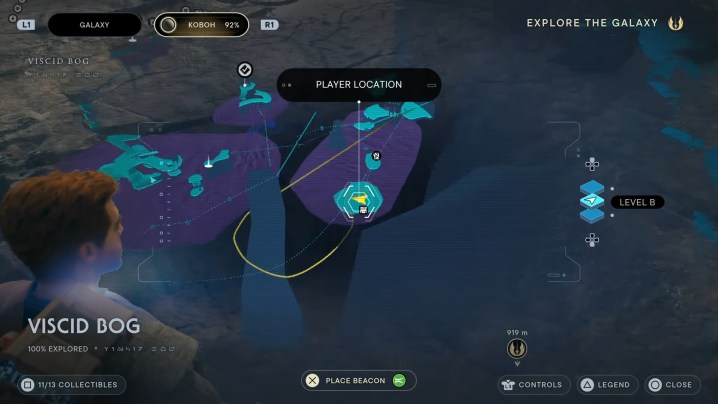
After you’ve done just about everything in this area and are able to take the elevator out of this dreadful place, make one last detour towards three stone poles you can use the Force on to make a path through the swamp. The other side will have a mogu mini-boss waiting for you, followed by an even more terrifying fight with a mogu named the Mire Terror. Take them both down, or do your best to run past them and pray you can open the chest on the far end of the arena before they stop you.
All Stim Upgrades on Jedha
Sheltered Hollow
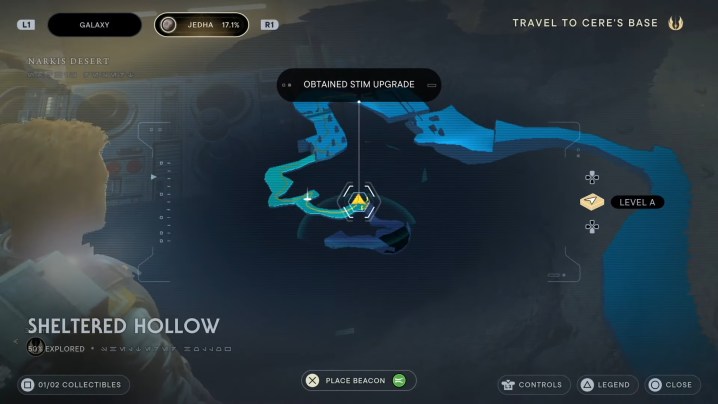
This is an unmissable Stim upgrade once you reach this part of the story. While you’re in the cave waiting out the storm, the chest is directly in your path.
Blustery Mesa
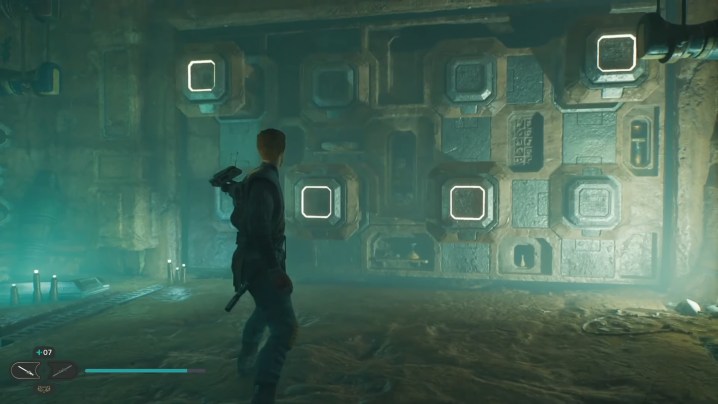
Part of the way through the Crypt of Uhrma on the way to Pilgrim’s Crossing, take a side path into the Crypt proper. The back of the room has a puzzle you need to Force push and pull eight blocks, four on the top row and four on the bottom, into the correct orientation. Here are which ones you want pulled out (glowing):
- Top row: Far left and far right
- Bottom row: middle two
Once done, the door will open and reveal the chest.
Shattered Moon
Assembly Staging

When you’re doing the “Research Tanalorr” mission, you will pick up the “Investigate the Factory Lower Levels” rumor from a droid. Drop down from the zipline to get to the area on your map where the rumor is marked, then use the Ascension Cable to climb up a ledge to your right. Take the next zipline, avoiding the electrified spot, and then follow the catwalk to the right when you land. Pop the chest open to get another Stim upgrade.
Editors' Recommendations
- All perks in Star Wars Jedi: Survivor
- Star Wars Jedi: Survivor is being review-bombed on Steam as a ‘total crap’ PC port
- Star Wars Jedi: Survivor: file size, release time, and preload options
- Resident Evil 4: All Yellow Herb locations
- All Resident Evil 4 remake Wayshrines and how to open them