
Fortnite Cipher quests: how to complete all Cipher and Encrypted quests

A new set of objectives has been added to Fortnite, and they’re called Cipher quests. These quests offer a wide variety of objectives, with some requiring you to find hidden items around the map, while others are more action focused. The quests are mostly straightforward, though a handful of them might cause some confusion, especially if you don’t play often. In this guide, we’ll show you how to complete the new Cipher quests, including the mysterious Encrypted challenges.

Recommended reading

Cipher quests

The regular Cipher quests are pretty straightforward, requiring you to engage in combat with other players, find items from chests, and visit specific locations. These require much less preparation, but can still be tricky.

Visit Bastion Outposts (3)

The Bastion Outposts are all found in the snowy area of the island in the upper northeastern area. Hit three of the four Outposts to complete this quest.

Collect ammo from chests (150)

Yet another easy one. For this, simply play normally and loot chests or ammo boxes and you’ll complete this one in no time.

Upgrade vehicles with Off-Road Tires or Cow Catchers (3)

For this quest, we recommend visiting gas stations around the map to find Off-Road Tires or Cow Catchers. Keep in mind, you need to utilize three upgrades, so grab multiple Off-Road Tires and/or Cow Catchers and then keep an eye out for vehicles. Throw these items onto the car to upgrade it.

Hit opponents with ranged weapons from 75 meters or more (5)

Character shooting from afar in Fortnite.

Once again, if you’re playing naturally, you’ll probably complete this quest without too much effort. To make it easier, try to get your hands on a DMR or long-range rifle. Then, use your pings to mark enemies, which will tell you how far away they are from you. As long as they’re at least 75 meters away, take your shots. Each shot at 75 meters counts for this quest, so try to connect as many times as you can to finish this one quickly.

Mark targets with the Falcon Scout (3)

The Falcon Scout in Fortnite.

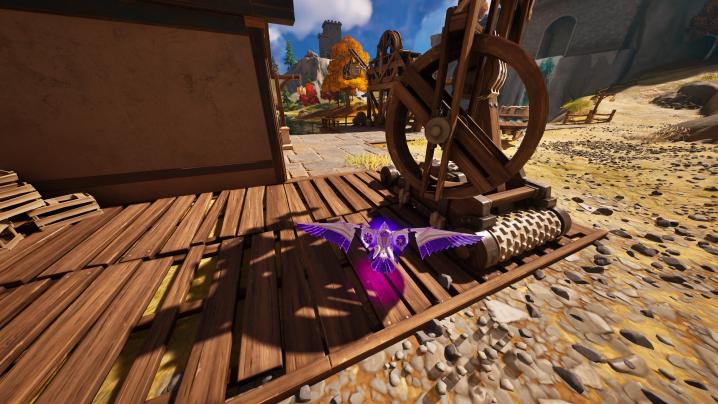
As you play, keep an eye out for the Falcon Scout item, which can be controlled remotely to mark opponents. We go into greater detail in a separate guide, but the main point is to find the Falcon Scout, and then head to a heavily populated area. Hide in a decent spot, then control the Scout to mark opponents. You only need three to finish this quest.

Drive a vehicle in different named locations (5)

This is yet another straightforward quest, but one that might take a little time depending on your luck and skill. Land somewhere that has a vehicle (such as gas stations) and you’ll earn credit for visiting a named location — such as Slappy Shores, Faulty Splits, or Anvil Square — so long as you’re driving. You need five named locations for this quest.

Get eliminations with a weapon of Uncommon, Rare, Epic, and Legendary rarity or higher (3)

Character shooting from afar in Fortnite.

If you play Fortnite regularly, you’re probably familiar with the rarity system, but just in case you aren’t, we’ll explain. There are four quests in this category — one for each of the named rarities. The four rarities and their respective colors are:

  • Uncommon: Green
  • Rare: Blue
  • Epic: Purple
  • Legendary: Orange

You need to secure three eliminations with each rarity to complete all the quests in this category. To gain access to the rarer weapon types, like Legendary, either upgrade them at upgrade stations, grab them from chests, or floor loot, collect them from Supply Drops, or even eliminated opponents.

Damage opponents with the Infantry Rifle or the Six Shooter (300, 1,000, 2,000, and 3,500)

This quest will take you a little while since it’s reliant on finding one of the aforementioned weapons in the wild, while also dealing lots of damage. There are four quests total, requiring you to deal 300, 1,000, 2,000, and 3,500 with either the Infantry Rifle or the Six Shooter. As you play, make sure you always get your hands on one of those weapons and then do your best to deal damage with them, whether to real players, creatures, or other NPCs.

Encrypted Cipher quests

List of quests in Fortnite.

First, let’s go over the Encrypted Cipher quests. These send you to locations around the map to collect specific items. The problem is that their descriptions are vague, making it tough to know where to find them.

1.17.23.9.14.19.19.24.1.21.6

Underground area in Fortnite.

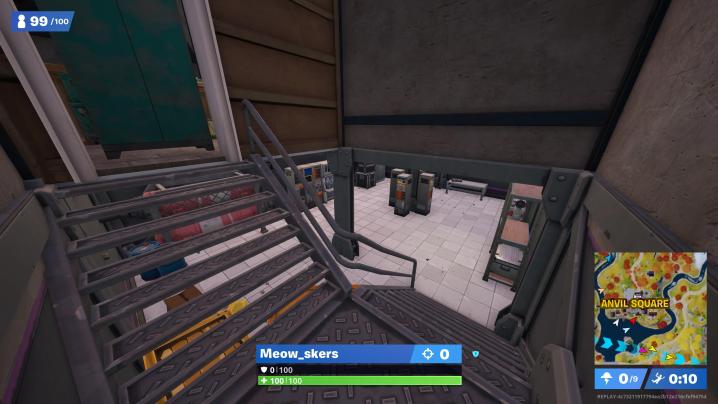
This encrypted location is found at Anvil Square. Head to this area and then make your way to the eastern side of this locale where you’ll find a garage with a bottom floor. You’ll need to destroy the green and yellow shelving unit to find the stairs that lead below. Go to this bottom floor and interact with a table along the wall to complete this quest.

12.18.15.5.14.25. 14.4.2.22

Orange container in Fortnite.

In the middle of the Lonely Labs area, you’ll find three large orange containers out in the open. The southernmost one is up against a large snowy hill, and if you head inside the container, you’ll find a hidden path that leads to an underground area. Go down to the bottom and interact with the computer in the center of the room and you’ll earn credit for completing this quest.

19.11.2.20.22.5.20.8.4. 22.13.1.4.19

Hidden location in Fortnite.

For this one, you’ll need to visit the northwestern side of Shattered Slabs, as shown on the map above. Beneath one of the massive slabs is a little area with Slurp Barrels, a chest, and a glowing mound. Smack it with your harvesting tool to uncover the last encrypted item.

Editors' Recommendations

Hogwarts Legacy: all Daedalian Key locations
A wizard walks through the open-world of Hogwarts Legacy.

Hogwarts Legacy is full of things to collect and loot, most of which comes from good, old fashioned treasure chests. While most can be opened freely, there's one in particular that is arguably the most difficult to crack open. The house chest is dangled in front of you very early on in the game, but you won't be able to open it for quite a while. The first step to doing so is to find 16 Daedalian Keys, which is already a lot before considering the magical twist this game puts on hunting them down. To save you from snapping your wand in two, here are all the Daedalian Key locations in Hogwarts Legacy, plus how to finally crack open your house chest.
How to start the Daedalian Key quest

To actually begin this quest of hunting down the keys, you will need to head outside and speak to a student named Nellie Oggspire. You can find her in the Transfiguration Courtyard, and she will tell you about these winged keys flying all around the area, as well as the location of the first one to help get you started. As you find the keys, they will lead you to a special cabinet where you start a minigame. The goal is to "slap" the key as it flies directly over the keyhole to unlock the cabinet. You can't fail at it, so take as many tries as you need. Once you nail it, the cabinet will open and give you a House Token.
All Daedalian Key locations
There are 16 total Daedalian Keys to hunt down to complete this quest, three of which you won't be able to get until you unlock the Alohomora spell by completing "The Caretaker's Lunar Lament" quest. We will note those specific keys for you so you know which to wait to get until you have that spell. These are the locations where you will find the keys themselves, but remember that you need to follow them to their associated cabinet and complete the timing minigame to actually collect the House Tokens you're looking for.

Read more
Nintendo Switch Game Vouchers: how they work and eligible games
A pair of nintendo switch game couvhers.

After disappearing from the store in 2019, Nintendo Switch Game Vouchers have returned to the eShop. These vouchers are a great value to those who are active Switch users and purchase a lot of their games digitally via the Nintendo online shop. By purchasing a voucher, players are able to browse a constantly expanding selection of Switch games, including many high-profile first-party titles such as Pokemon Scarlet and Violet, Splatoon 3, and Animal Crossing: New Horizons, and use their vouchers to purchase games. In addition, they can also be used to preorder upcoming titles.

If you neverhad the chance to use them before, here's everything you need to know about Nintendo Switch Game Vouchers.
How Nintendo Switch Vouchers work

Read more
Hogwarts Legacy: how to solve every Merlin Trial
A student waving a wand in Hogwarts Legacy.

Even in the universe of Harry Potter, the mythical Merlin is still a legendary figure of the wizarding world. In the case of Hogwarts Legacy, you will have plenty of side activities, quests, and challenges to complete around the open world, however one set is inspired by this powerful magician. Merlin Trials are unlocked and placed all over your map after you complete the "Trials of Merlin" main quest. This will introduce you to the type of magical challenges these trials will present you, but not all of them. Here are all the different types of Merlin Trials in Hogwarts Legacy, and how you're intended to solve them.
How to beat all Merlin Trials

While there are many of each, 85 in fact, there are nine basic trial types you will encounter. They will all be changed up in some way, but still require the same solution. Bear in mind that some trials do require your character to know specific spells, so if you don't have those unlocked yet, the trials won't be able to be solved. If you're ever unsure of what to interact with during the trials, use Revelio to light up interactable objects.
Roll the ball (Depulso required)
This trial type asks you to use the Depulso spell to knock a big sphere to a designated pit in the ground. Simply keep nudging them until you roll them into the slot. Some trials may require you to burn debris off the hole first, so keep that in mind.
Stack the balls (Accio required)
This is another ball-moving puzzle, but this time the balls are small and you need to lift and place them into slots on different platforms.
Blast the balls
One of the most simple trials, this one just asks you to shoot a bunch of targets around the area with any attack spell. The only tricky part can be finding them all.
Blast the slabs
Almost identical to the prior trial, but this time you just need to blast the green stone slabs.
Light the torches (Confringo required)
This type of trail asks you to ignite three torches before any of them go out. As soon as you light the first torch, it will begin sinking into the ground and extinguish the flame once it is fully submerged. Some torches are on higher platforms than others, so it is usually best to start with those to give yourself the most time.
Escort the moths (Lumio required)
Using your Lumio spell, you need to lead three clusters of moths to a glowing statue. Once you bring all three groups of moths to the statues, you're done.
Fix the statues (Reparo required)
A simple trail, this one tasks you with finding the three broken statues and fixing them up with your Reparo spell.
Match the symbols (Flipendo required)
A set of three columns, each with two sections, will be in the area. Each face of the sections bears a symbol you need to rotate through using Flipendo to match the symbols on each column.
Platforming
The last trial type is a simple test of your platforming skills. You just need to navigate an obstacle course of stone platforms all the way to the end without falling. During some trials, we've found that you can actually get on your broom and fly over platforms to activate them. While we're not sure if that's a bug that might get patched out down the line, it currently makes these challenges much easier.

Read more