A query that needs clarification, why on Earth do I need to delete files? The answer to the question is your Mac storage medium has a limited storage capacity and gets filled up as and when you create or save new files. Also, the recent Mac models come with solid-state drives that have even lesser storage than hard drives. So, the need for free space is high in SSDs. By deleting junk, duplicate, or no longer required files from your Mac, you ensure you manage the files well and meet your Mac's free space requirement.
Different Ways to Delete Files on Mac
As a MacBook, iMac, or Mac mini user, you know how to delete files from your Mac storage medium. You select the files, secondary-click on the selection, and choose Move to Trash. Or, drag and drop the selected files to the Dock’s Trash icon. Alternatively, you can press the Command + Delete hotkey to move the selected files to Trash. The above methods delete your files temporarily from your Mac.
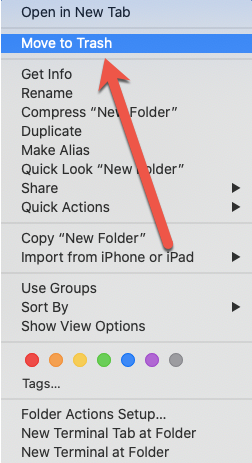
To delete files permanently, you secondary-click on the selected files, press the Option key, and choose Delete Immediately. Or, you secondary-click on the Trash icon and pick Empty Trash. Alternatively, you press the Option + Command + Delete hotkey after selecting the file to delete it immediately. All the above permanent delete operation may require you to confirm before deletion. To bypass confirmation, you press Shift + Option + Command + Delete hotkey, and macOS instantly deletes the selected files for good.

If you are an expert in using the Terminal app, you can delete files permanently using the rm command. Launch Terminal and type rm <drag-and-drop-file-to-add-path>, then hit Return.
Need for Recovering Deleted Files on Mac
Being a human, we tend to make errors. And unintentionally deleting files is one such human error. The provision for data recovery in Mac helps us undo our mistakes and get back our precious photos, videos, documents, emails, audios, and archives that you could delete by mistake. Further, data recovery allows us to salvage files lost due to other data loss situations besides human error, such as hardware or software failure, natural disaster, theft, or sabotage.
Different Ways to Recover Deleted Files on Mac
Mac has native applications that can help you safeguard against accidental file deletion. If the native methods are of no help, you can install third-party applications to recover your permanently deleted files. The three different ways to recover deleted file on Mac are as follows:
1. Recover Deleted Files Using Trash
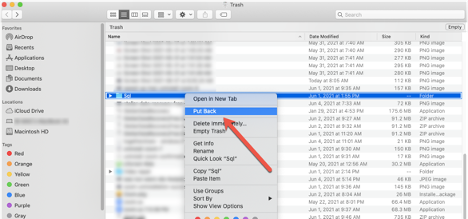
Trash comes in handy when you delete files temporarily from an internal or an external Mac storage medium. To recover your temporarily deleted files, immediately press the Command + Z hotkey. Or, open the Trash folder, search and select the deleted files, secondary-click the selection, and choose Put Back. Alternatively, drag and drop the deleted files present on the Trash folder to Desktop or anywhere else in Finder.
2. Recover Deleted Files Using Time Machine
Time Machine can be a saviour in various data loss scenarios from an internal Mac drive. Use Time Machine to restore files in file permanent deletion, file corruption or overwriting, partition loss, storage drive corruption, and disk damage. Even you can use Time Machine to restore macOS if your Mac fails to boot.
Time Machine needs a dedicated storage medium, initial set up, and uninterrupted connectivity with Mac. Once you complete the setup, Time Machine acts as a backup and restoration workhorse and ensures you’ll never lose your deleted files again. After the first backup, Time Machine performs incremental backup every hour for 24 hours, daily for the past 1 month, and weekly for all previous months.
To recover permanently deleted files on Mac, please use Time Machine to restore them. Check the Time Machine backup drive connection, then open the Finder location from where you’ve accidentally deleted files. Go to the Menu bar, click the Time Machine icon, and select Enter Time Machine. Use the Up or Down arrows or TimeLine to peek through backups. Select the files, then click Restore.
3. Recover Deleted Files Using Mac Data Recovery Tools
When the file creation and permanent deletion task occurs after Time Machine’s last hourly incremental backup, trying a free, open-source file recovery software—say TestDisk—is a no-brainer. You can use the character-user interface of the software to input commands and recover your deleted files. There is no harm in doing a file recovery experiment as the software won’t write on the storage volume from where it retrieves data.
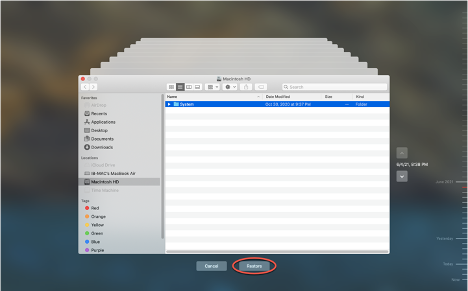
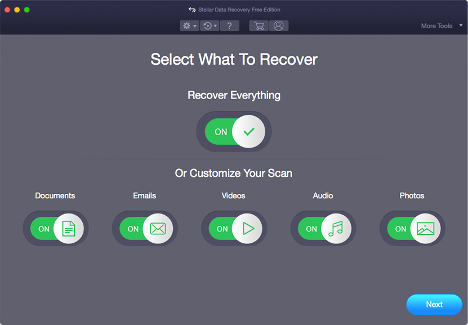
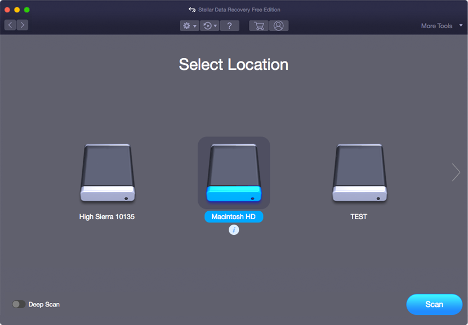
And, if you want a GUI-based recovery solution, look for Stellar Data Recovery Free Edition for Mac. Once you find one, install it on your Mac. Launch the tool, then perform the fundamental data recovery steps—Select, Scan, and Recover. Select the type of file you want to recover and the Mac volume from where you’ve accidentally deleted files.
Scan your Mac volume using an advanced scan option.
After the scan, preview, and select your deleted files. Recover the files on a different storage volume, preferably an external drive to avoid data overwriting.

Did you Know: With Stellar Data Recovery Free Edition, you can recover 1 gigabyte of lost or deleted files for free.
Final Thoughts
You can use Time Machine or file recovery software to recover your deleted files and prevent accidental file loss. When you haven’t set up a Time Machine backup drive, set it up as soon as possible to ensure your digital data is safe. Also, install a file recovery software beforehand on your Mac to make sure you can launch it immediately after a data loss event to scan your start-up disk and recover all your deleted files. This prompt action of yours can help you avoid irrecoverable data loss that can occur due to file overwriting.